
Hello everyone, welcome back to techbrushup. In this tutorial, we will learn how to Solve Whitelabel Error Page Problem in Spring Boot application.
Additional info:
prerequisite:
Must have have look in error status code (404 or 500 or some thing else)
Install Extension Pack
Step 1: Open visual studio and install some recommended extension as below
Extension Pack for Java Extension Pack of (6)

Spring Boot Extension Pack Extension Pack of (3)

Create Java Project
Step 2: After the above extension is installed, you will notice that the 'create a Java project' button is now available. It was not there before.

Step 3: Now click on create a Java project and select the project type 'Spring boot'.

Step 4: Select the project type 'Maven Project' and hit enter

Step 5:Specify Spring Boot version and choose latest top one

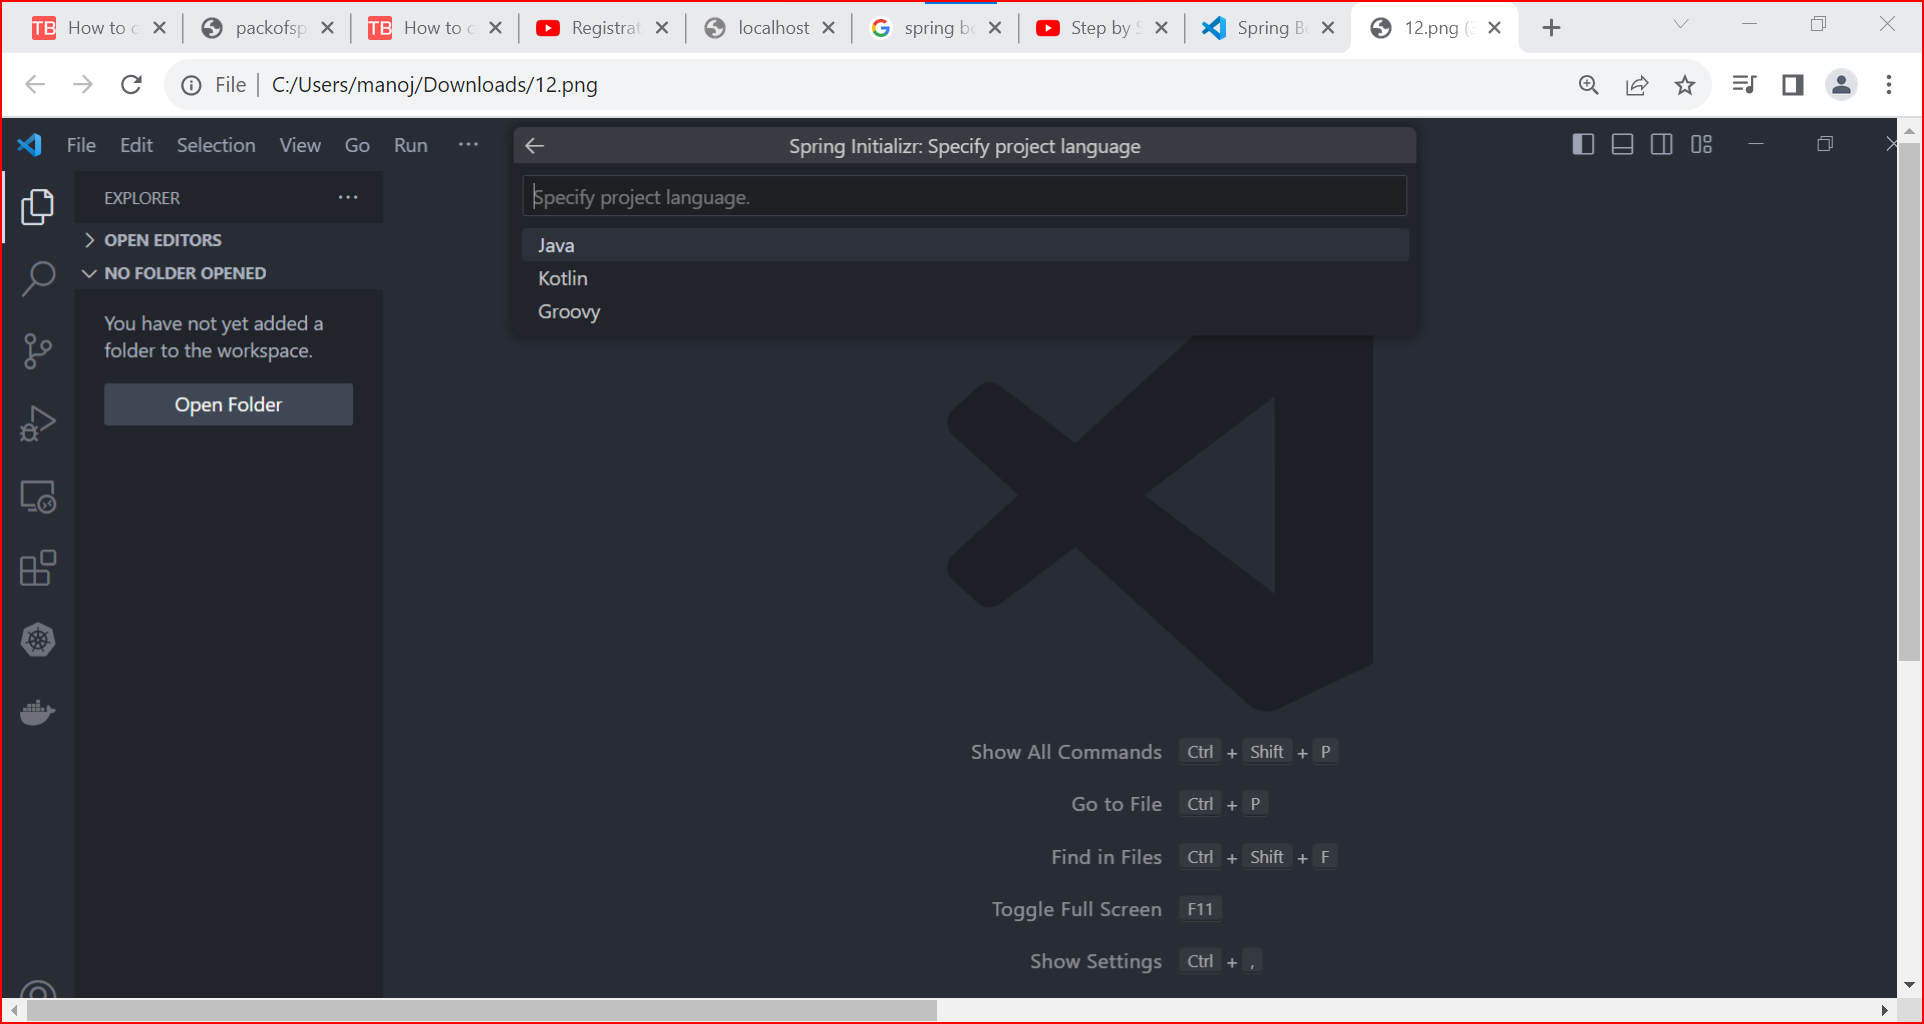
Step 6:Specify project language and choose 'java'
Step 7: Input group id of your project (press enter to confirm)

Step 8: Input Artifact Id of your project(press enter to confirm)

Step 9: Specify packaging type, choose the jar

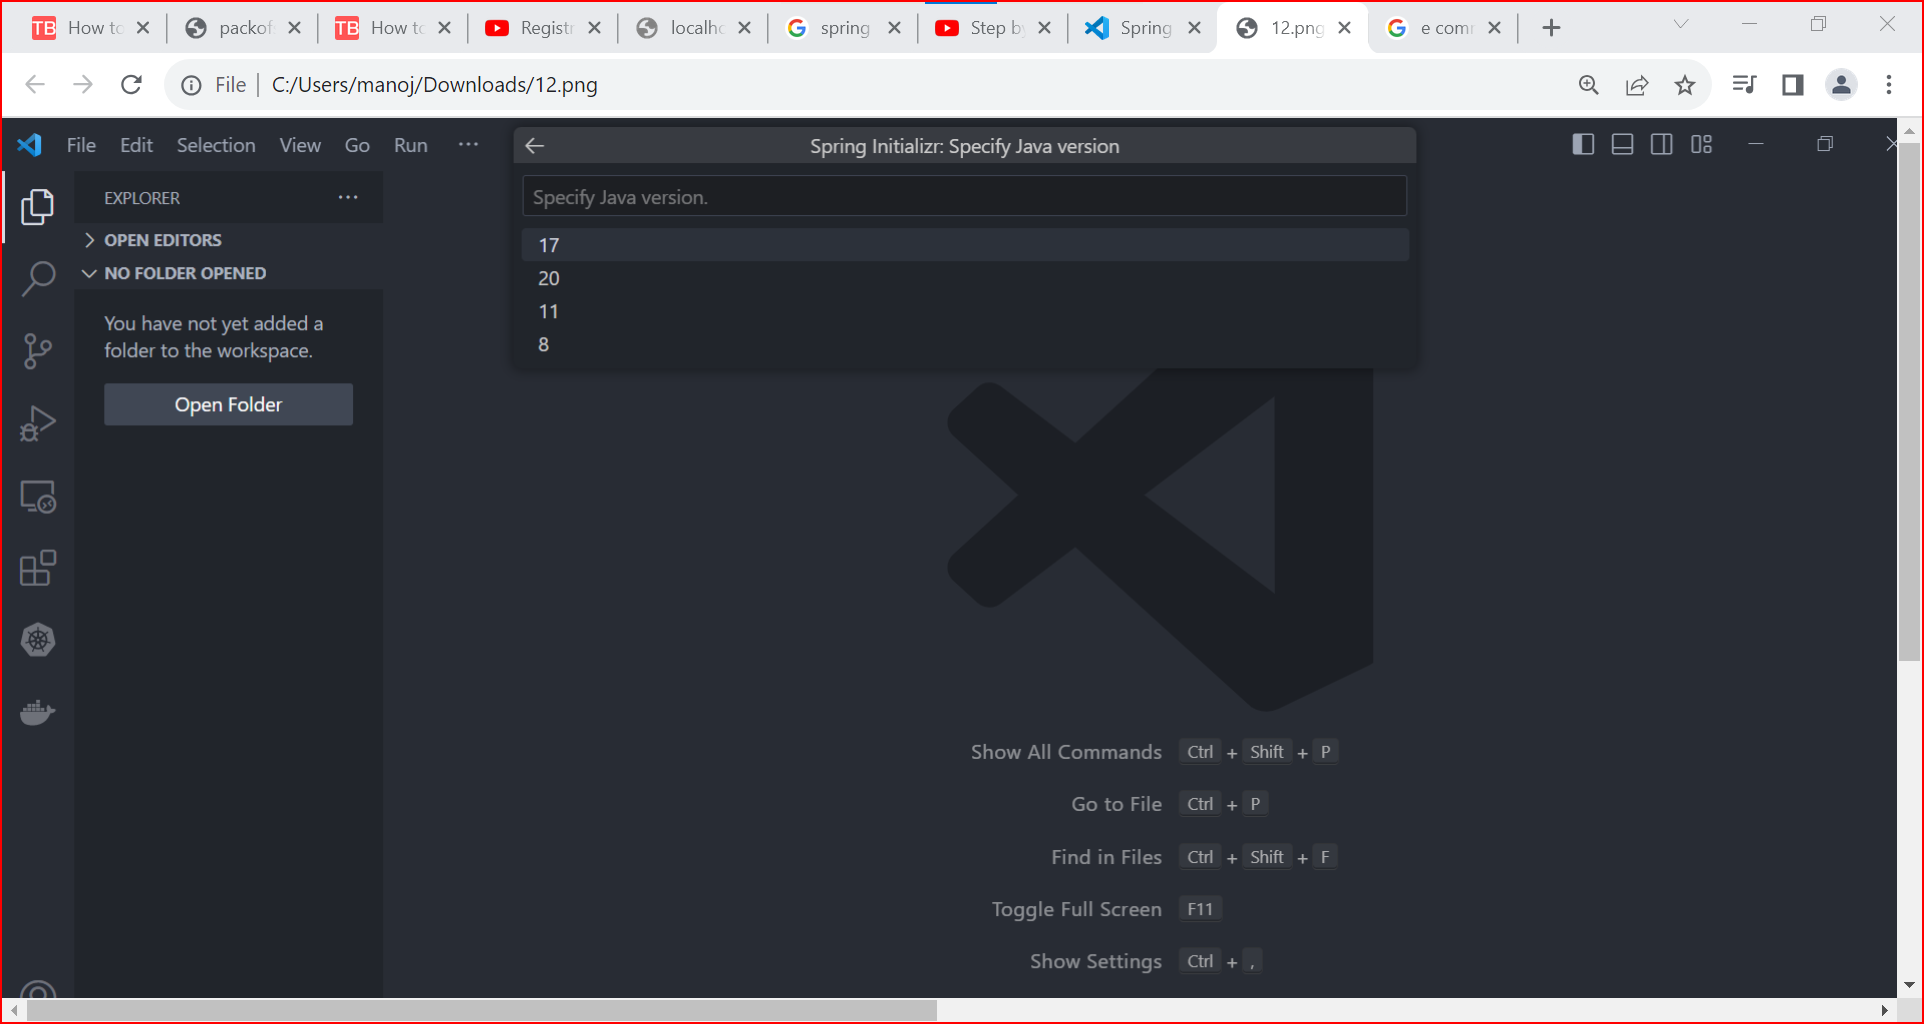
Step 10: Specify java version, choose 21 (at the time to create this article)
Install Dependency
Step 11: Search for dependencies and choose as per requirement ,basic are given below , you can see that Selected 6 dependencies
- Spring Boot Devtool
- Spring Web
- Spring Data JPA
- Lombok
- Thymeleaf
- MySQL Driver

Step 12:Now choose folder to generate project.

Step 13:After sucessfully generated you will get a prompt, open it as below.

Building and run the Application
This section teaches you how to build and run the Application using VS Code.
Step 14: Here you can see the run option so just click on this run and run java and choose this hello application so let me just click enter so this will run our springboot application so you can see here this springboard application has been started and it started on port 8080 so let me just quickly go to my browser and let me just type localhost8080 and hello and you can see here the output.

Step 15: You can see here spring boot application has been started and it started on port 8080 so let me just quickly go to my browser and let me just type localhost8080 and hello and you can see here the output.

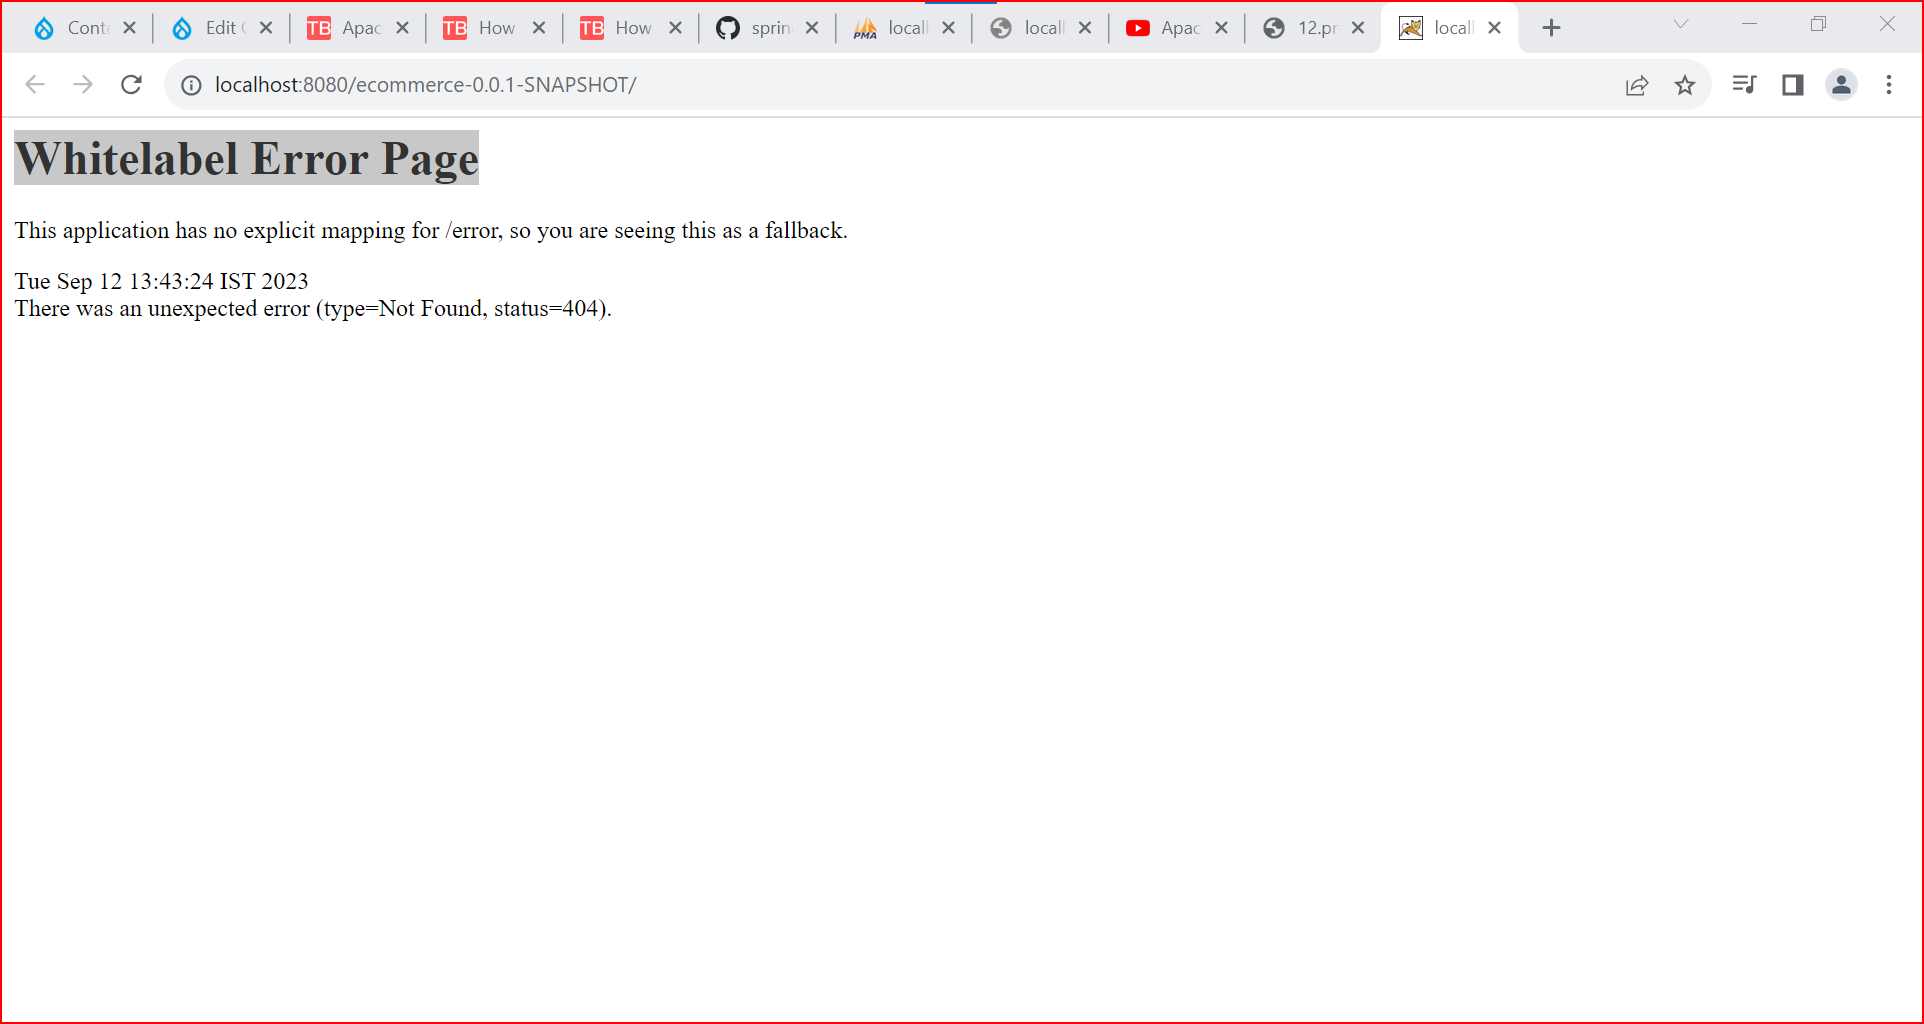
Step 16: Run your application on browsers ,
Step 17: By default you will see '
Whitelabel Error Page
It is expected that your project ran successfully.
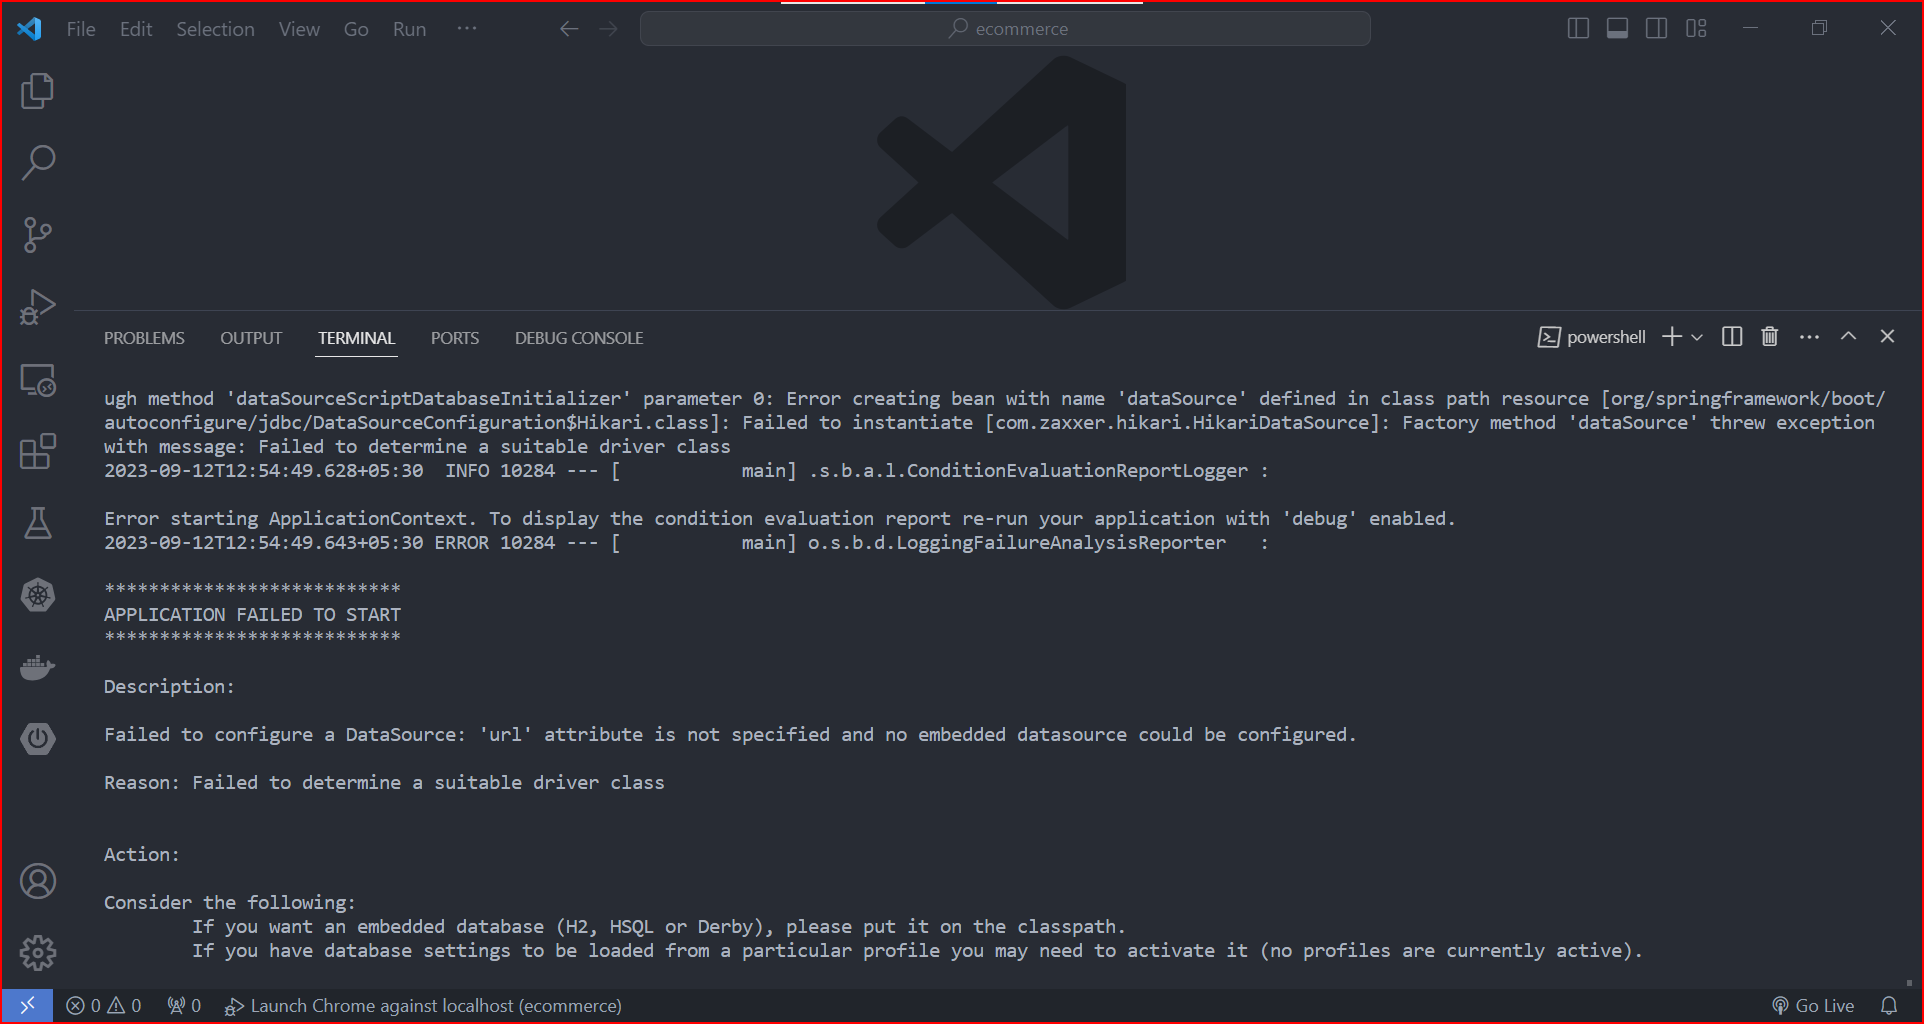
Step 18: In case of build failure you need to be figure out if if correct java version configured or not
Step 19: Go on Java projects click on the three dots and then configure Java runtime or command shift p on a Mac or Ctrl shift p on a Windows search for Java configure Java runtime here I can see my projects types and the Java version if I don't have Java 17 installed already
Step 20: Now it's time to make your project functional, Lets create 3 layer architecture project.
First open project under 'JAVA PROJECT' in VS Code, Go to src/main/java and click add to create a package.

- Controller
- Entity
- DAO (stands for Data Access Object)
Step 21: add dependency into application.properties files
spring.datasource.url=jdbc:mysql://localhost:3306/ecommerce
spring.datasource.driver-class-name=com.mysql.cj.jdbc.Driver
spring.datasource.username=root
spring.datasource.password=password
spring.jpa.hibernate.ddl-auto=update
spring.jpa.properties.hibernate.dialect=org.hibernate.dialect.MySQL8Dialect

Step 22: Create first package by Click + icon in front of src/main/java and Create first package by selecting package , input the package name 'controller' and Press enter to confirm

Step 23: Create first class under package by Click + icon in front of controller package select Java Class and input the class name (classname: Parentcontroller), Press enter to confirm

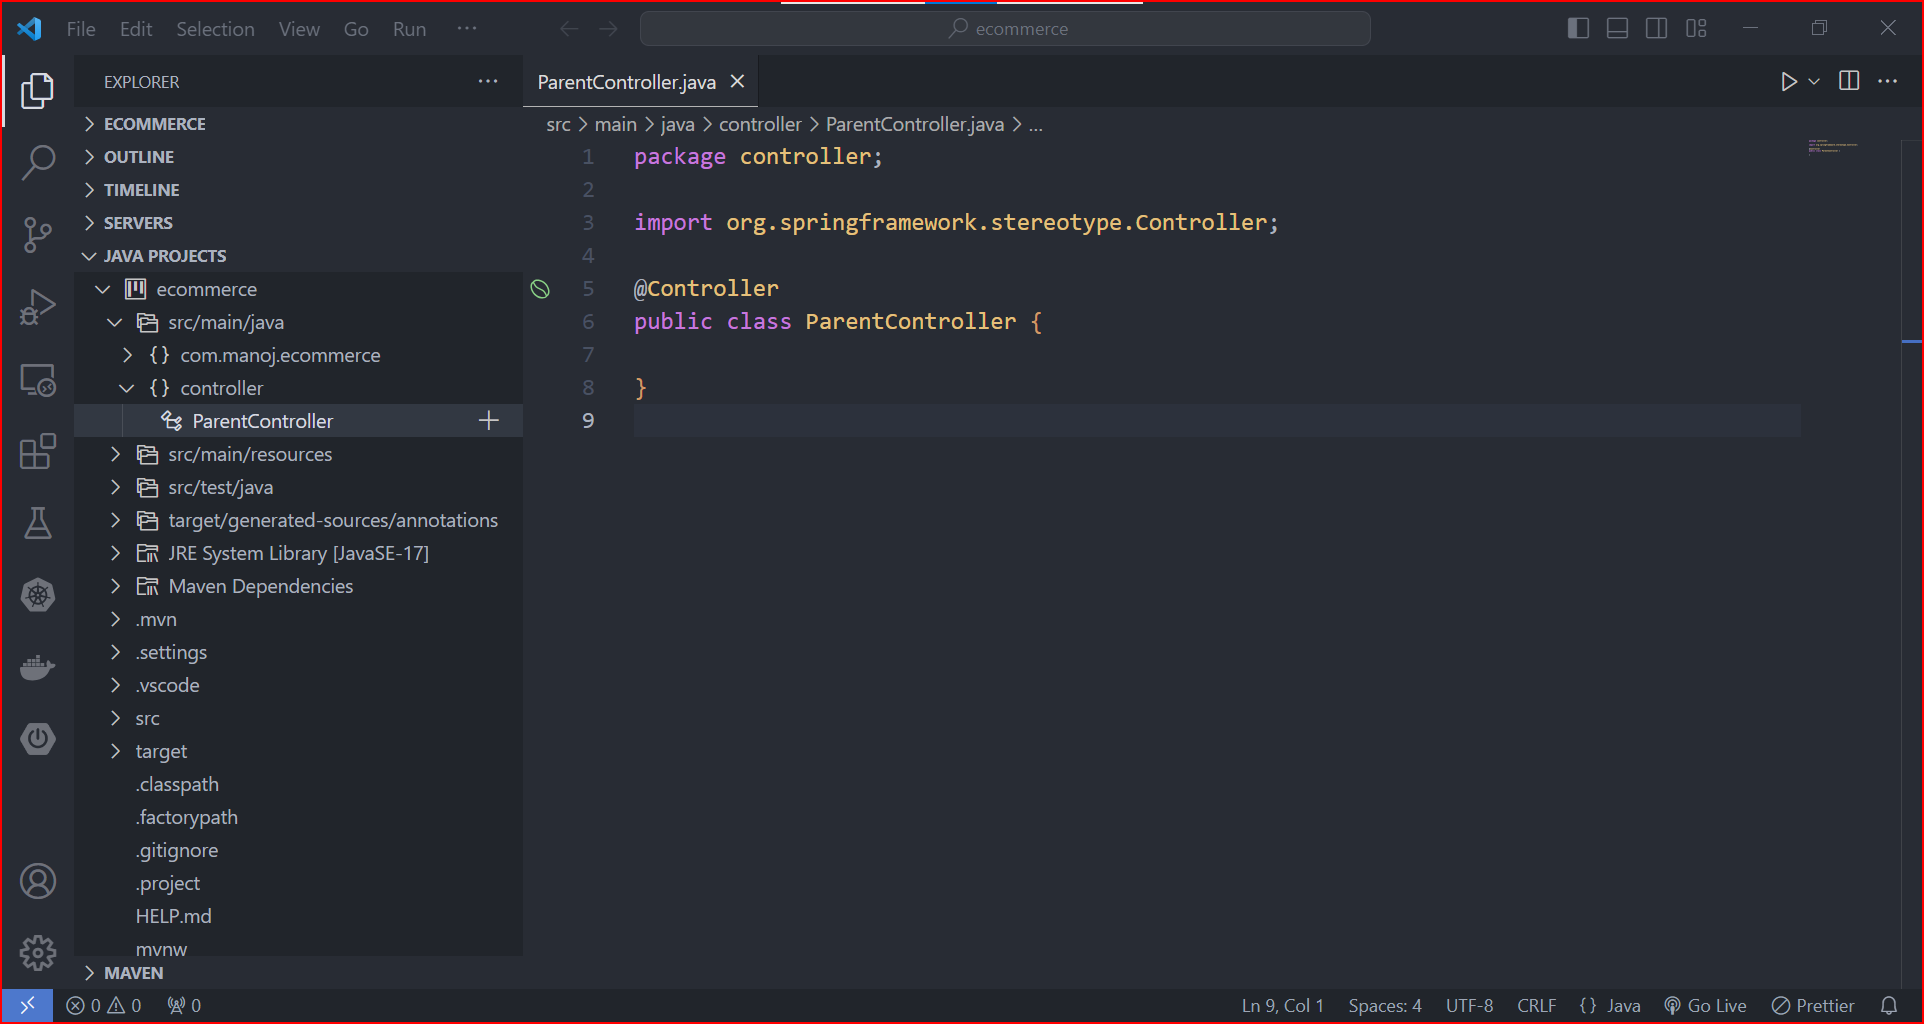
Step 24: Need to import predefined classes for controller Press @Controller, it should highlight see below select and choose Controller
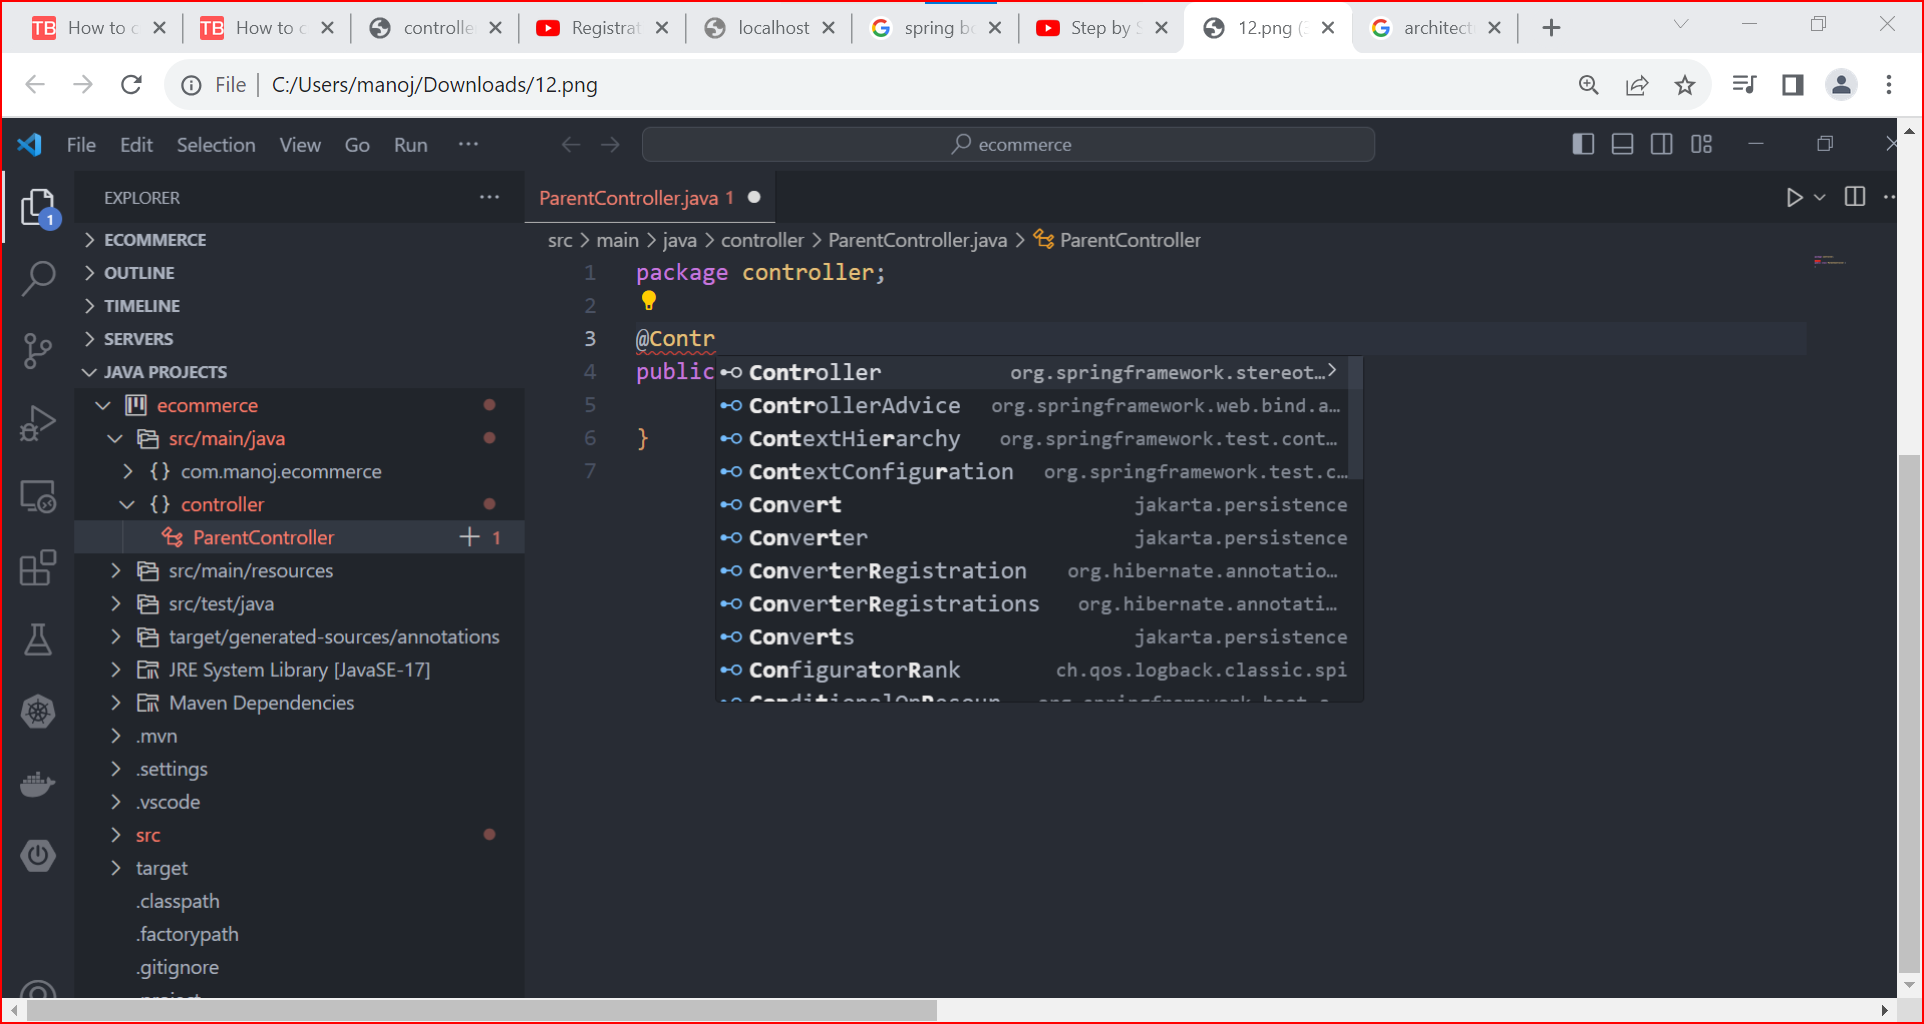

Step 25: You can see dependency (import org.springframework.stereotype.Controller;) automatically imported
Step 26: Create first method 'index' inside first controller

Step 27: Create our first web page which will print the text “Welcome to spring boot world!” on the screen for this Click + icon in front of templates (src/main/resources/templates) and Create index.html file.

Step 28: write welcome message into your html file.

Step 29: Next learn how to deploy and run project on tomcat server just follow the link.... Apache Tomcat Setup
Step 30: Rebuild project every time if you want to check any modifications or changes you have done , by using 'mvn clean package'